I’ve always wondered what the best way to create a blog is - meaning it should be both development friendly and easy for clients to edit. I stumbled upon using Jekyll (a static blog generator) with Netlify for hosting as well as Netlify CMS for content management. This stack has been my go to for creating blogs, it’s super easy to get started and fun to work with.
In this series, we will be making a blog editable via Netlify CMS.
The final product will look like: http://adrianyadav-blog.netlify.com/ and we will make every bit of content on the page editable via an admin interface Netlify provides.
Few notes
If you are ever unsure of how a file should look like: take a look at the completed repo.
If you see the command “Code” in the snippets, it’s set to opens visual studio code, feel free to use whatever text editor you want.
Let’s get started
I’ve already created a repo to help kickstart off things
git clone git@github.com:adrianyadav/jekyll-template-starter.git my-blog
cd my-blog
bundle
jekyll serve --livereload
Open up http://127.0.0.1:4000/ in the browser and you should see the following:

Let’s commit everything to Git.
git init
git remote set-url origin <your-origin-here>
git add --all
git commit -am "initial commit"
git push origin master
jekyll serve --livereload
Connecting the repo to Netlify
Sign up for an account on https://www.netlify.com/ and log in. Hit the create a new site button and connect it to your git account, select the repository and hit deploy.
If you get stuck follow on from here.
If all goes well, Netlify will deploy your site live on a randomly generated URL like https://adoring-murdock-f38c3d.netlify.com/.
Adding Nelify CMS to the blog
mkdir admin && cd admin && touch index.html
code index.html
Copy the following into index.html.
<!-- admin/index.html -->
<!DOCTYPE html>
<html>
  <head>
    <meta charset="utf-8" />
    <meta name="viewport" content="width=device-width, initial-scale=1.0" />
    <title>Content Manager</title>
  </head>
  <body>
    <!-- Include the script that builds the page and powers Netlify CMS -->
    <script src="https://unpkg.com/netlify-cms@^2.0.0/dist/netlify-cms.js"></script>
  </body>
</html>
Create the config file with the following contents.
touch _config.yml
# config.yml

backend:
name: git-gateway
branch: master # Branch to update (optional; defaults to master)
media_folder: 'assets/uploads'
collections:

-   name: "blog"
    label: "Blog"
    folder: "\_posts/"
    fields:
    -   { name: Title }
Enable identity and git gateway:
Follow the instructons on Netlify Docs. Create a user for yourself and enable git gateway too.
code \_includes/head.html
add the following:
<script src="https://identity.netlify.com/v1/netlify-identity-widget.js"></script>
Your head.html file should end up like the following:
<head>
	<meta charset="UTF-8" />
	<meta name="viewport" content="width=device-width, initial-scale=1.0" />
  	<link
		href="https://fonts.googleapis.com/css?family=Nunito+Sans:400,400i,700&display=swap"
		rel="stylesheet"
	/>
	<script src="https://identity.netlify.com/v1/netlify-identity-widget.js"></script>
...
</head>
Let’s commit everything and push.
git add --all
git commit -am "added netlify cms"
git push origin master"
Every time you push to git, your netlify site will redeploy. Now, check your email and you should have received one from Nelify.

Click on “accept the invite link” which will let you create a password for your Netlify account.
add /admin to your site and login, e.g. https://adoring-murdock-f38c3d.netlify.com/admin
You should get the below:
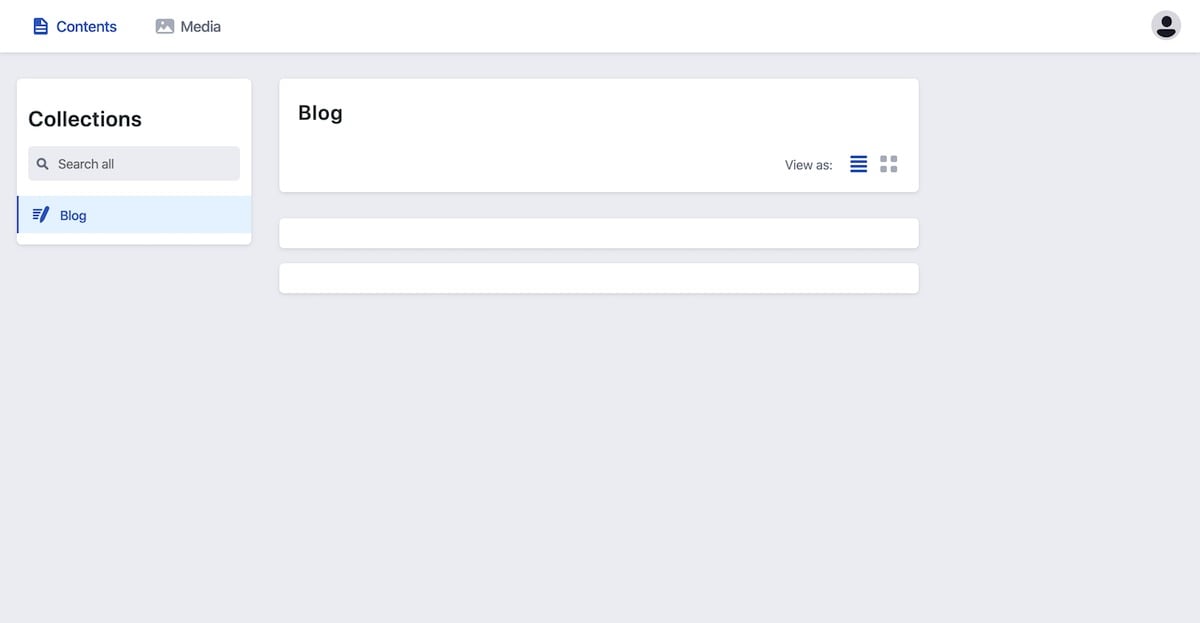
Let’s add the ability for users to create and delete posts
Open up your netlify /admin/config.yml and replace collections with the folowing
collections: # A list of collections the CMS should be able to edit

-   name: "post" # Used in routes, ie.: /admin/collections/:slug/edit
    label: "Post" # Used in the UI, ie.: "New Post"
    folder: "\_posts" # The path to the folder where the documents are stored
    sort: "date:desc" # Default is title:asc d
    description: "Manage your posts here"
    create: true # Allow users to create new documents in this collection
    slug: "---"
    summary: " -- //"
    fields: # The fields each document in this collection have
    -   { label: "Layout", name: "layout", widget: "hidden", default: "post" }
    -   { label: "Title", name: "title", widget: "string", tagname: "h1" }
    -   { label: "Body", name: "body", widget: "markdown" }
    -   {
        label: "Categories",
        name: "categories",
        widget: "string",
        required: false,
        }
        meta: # Meta data fields. Just like fields, but without any preview element
    -   {
        label: "Publish Date",
        name: "date",
        widget: "datetime",
        format: "YYYY-MM-DD hh:mm:ss",
        }
Commit and push.
git commit -am "feat: posts"
git push origin master
You can also access /admin locally.
jekyll serve --livereload
http://127.0.0.1:4000/admin/
Create a new post through the GUI and in few seconds you should see it at top:
https://adoring-murdock-f38c3d.netlify.com/
Remember to sync your local with the live version everytime you create a new post.
git pull origin master
Next steps
Now that all the setup is done, we can move on the fun stuff. In the next part, we will make the rest of the site editable via netlify (the header, footer and about page).
Stay tuned.
Sign up to updates
I'll send you an email when there's a new article to read.